Tasmania Trip - Part 5
A Long-Awaited Ascent to Wineglass Bay
When we arrived at the tyre repair shop just after 8 AM, a single customer was already being helped, so we waited quietly, watching the mechanic go about his work with practised efficiency. Before long, he came over to inspect our tyre. With a few swift movements, he had it off and into the workshop. Moments later, he returned with surprising news: the tyre could be repaired. The puncture was deep, yes, but not fatal — it hadn’t damaged the internal structure. He explained that it required a special adhesive and about 30 to 45 minutes to set properly.
That left us stranded — carless and slightly marooned just outside of town. But then it dawned on me: We were in Bicheno. The Bicheno — home to the Lobster Shack, that seafood spot I’d been hoping to try since our second day. Back then, we’d been in the wrong town. Yesterday, the flat tyre had thrown us off course. Now, finally, we were here... but of course, it was far too early for lobster rolls. Even if we waited out the tyre repair, it would barely be 9:30 AM. The restaurant likely wouldn’t be open yet, and we couldn’t justify wasting more time just loitering.
It felt like the universe was dangling this one elusive lobster in front of us like a carrot on a stick. Right place, wrong time. Again. Maybe — hopefully — we’d get lucky on our drive to Hobart. Third time’s the charm?
While we waited, I called the rental company to report the repair and confirm that there’d be no extra charges when we returned the vehicle. Finally, I got a straight answer — no additional fees. That little bit of clarity brought a huge wave of relief.
With the tyre patched up and back in place, we hit the road, heading directly for Freycinet National Park, with one mission in mind: Wineglass Bay.
Most people assume the bay’s name refers to its elegant curve — that delicate, rounded arc resembling a wineglass tipped gently against the coast. But the truth is darker. In the early 1800s, whalers dragged their harpooned prey into this quiet bay. The bloody process of butchering them turned the water a deep, violent red — like a glass of spilt red wine. From 1820, the bay operated as a whaling station for nearly twenty years. Whale blubber was boiled for oil, and bones sent abroad, used in corsets and crinolines — gruesome remnants of an industry built on elegance.
The peninsula itself owes its name to the Freycinet brothers, Louis Claude and Louis Henry, who were part of Nicholas Baudin’s 1802 French expedition that charted much of Australia’s southern coastline. Even after the whalers moved on, the region wasn’t safe. Farmers arrived, then miners came for tin and coal. But in 1916, the tides turned — Freycinet was declared a national park, forever preserving its rugged coastline and wild heart.
With our parks pass ready, we breezed through the entrance and made our first stop at the Freycinet Visitor Centre. There, we picked up a map and asked the staff a few essential questions: where to find the best view of Wineglass Bay, where to sample fresh local oysters and mussels, and the best places in the park to catch a sunset — or perhaps sunrise, if we felt ambitious.
Armed with their suggestions, we drove to the Wineglass Bay car park. Just as we began the trail, I noticed a large, metal whale sculpture. At the time, I thought it a whimsical piece of coastal art. It wasn’t until later, after learning the grim history of the bay, that its presence struck me as something deeper — a quiet, iron monument to the suffering once inflicted here.
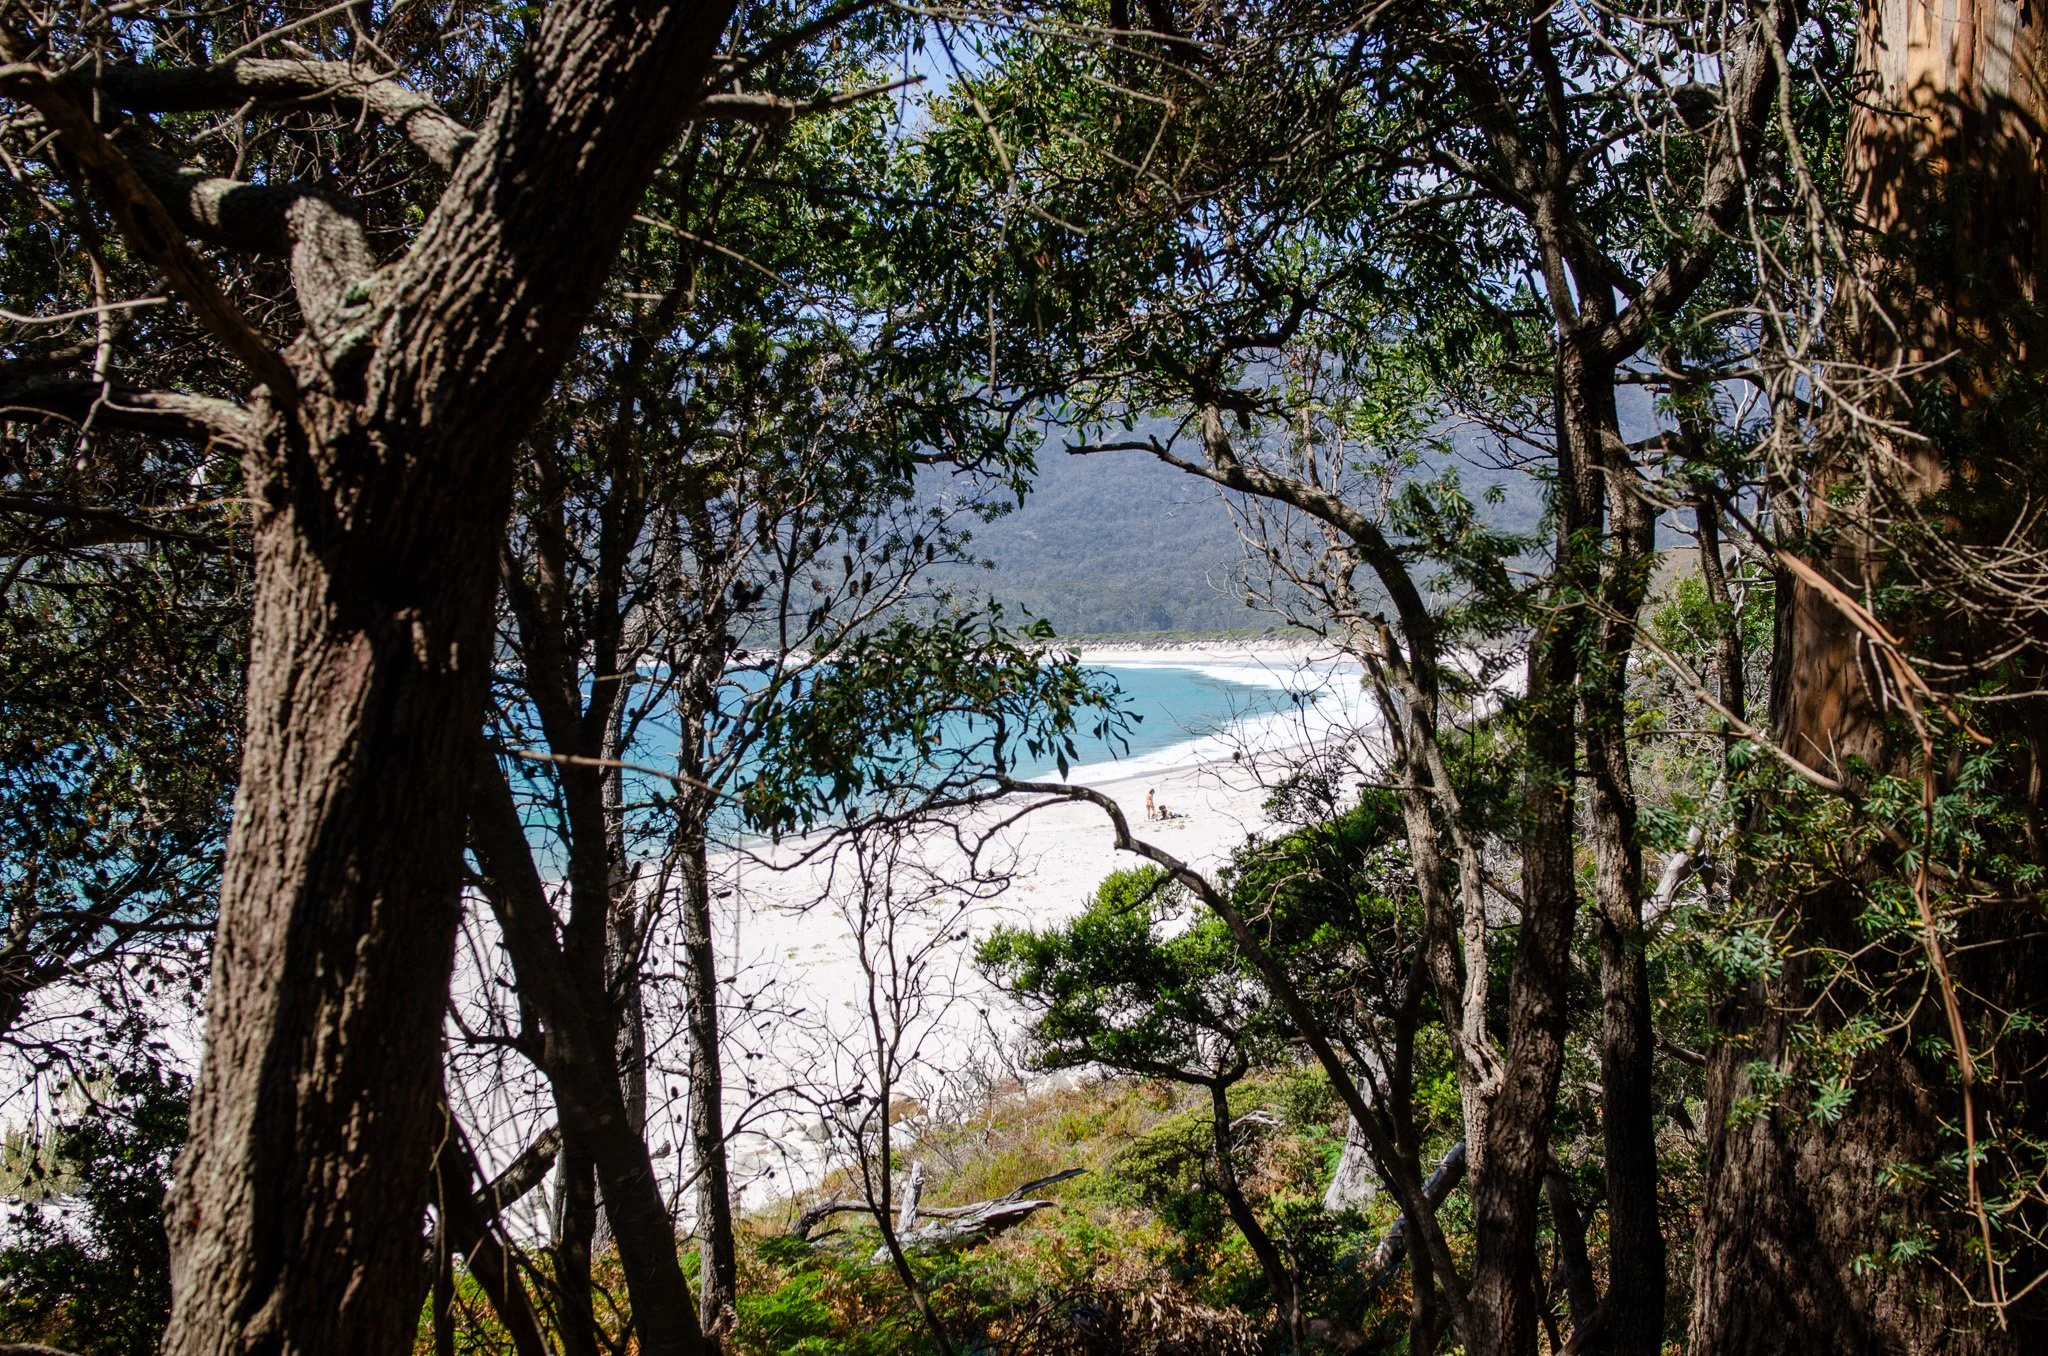
The trail to the lookout is only 1.3 km one way, but it climbs steadily through coastal woodland, threading past granite boulders and leafy thickets. It was steep, but manageable — especially thanks to the well-placed resting points along the way. Each pause gave us a glimpse of the sea, building anticipation like the slow lift of a curtain.


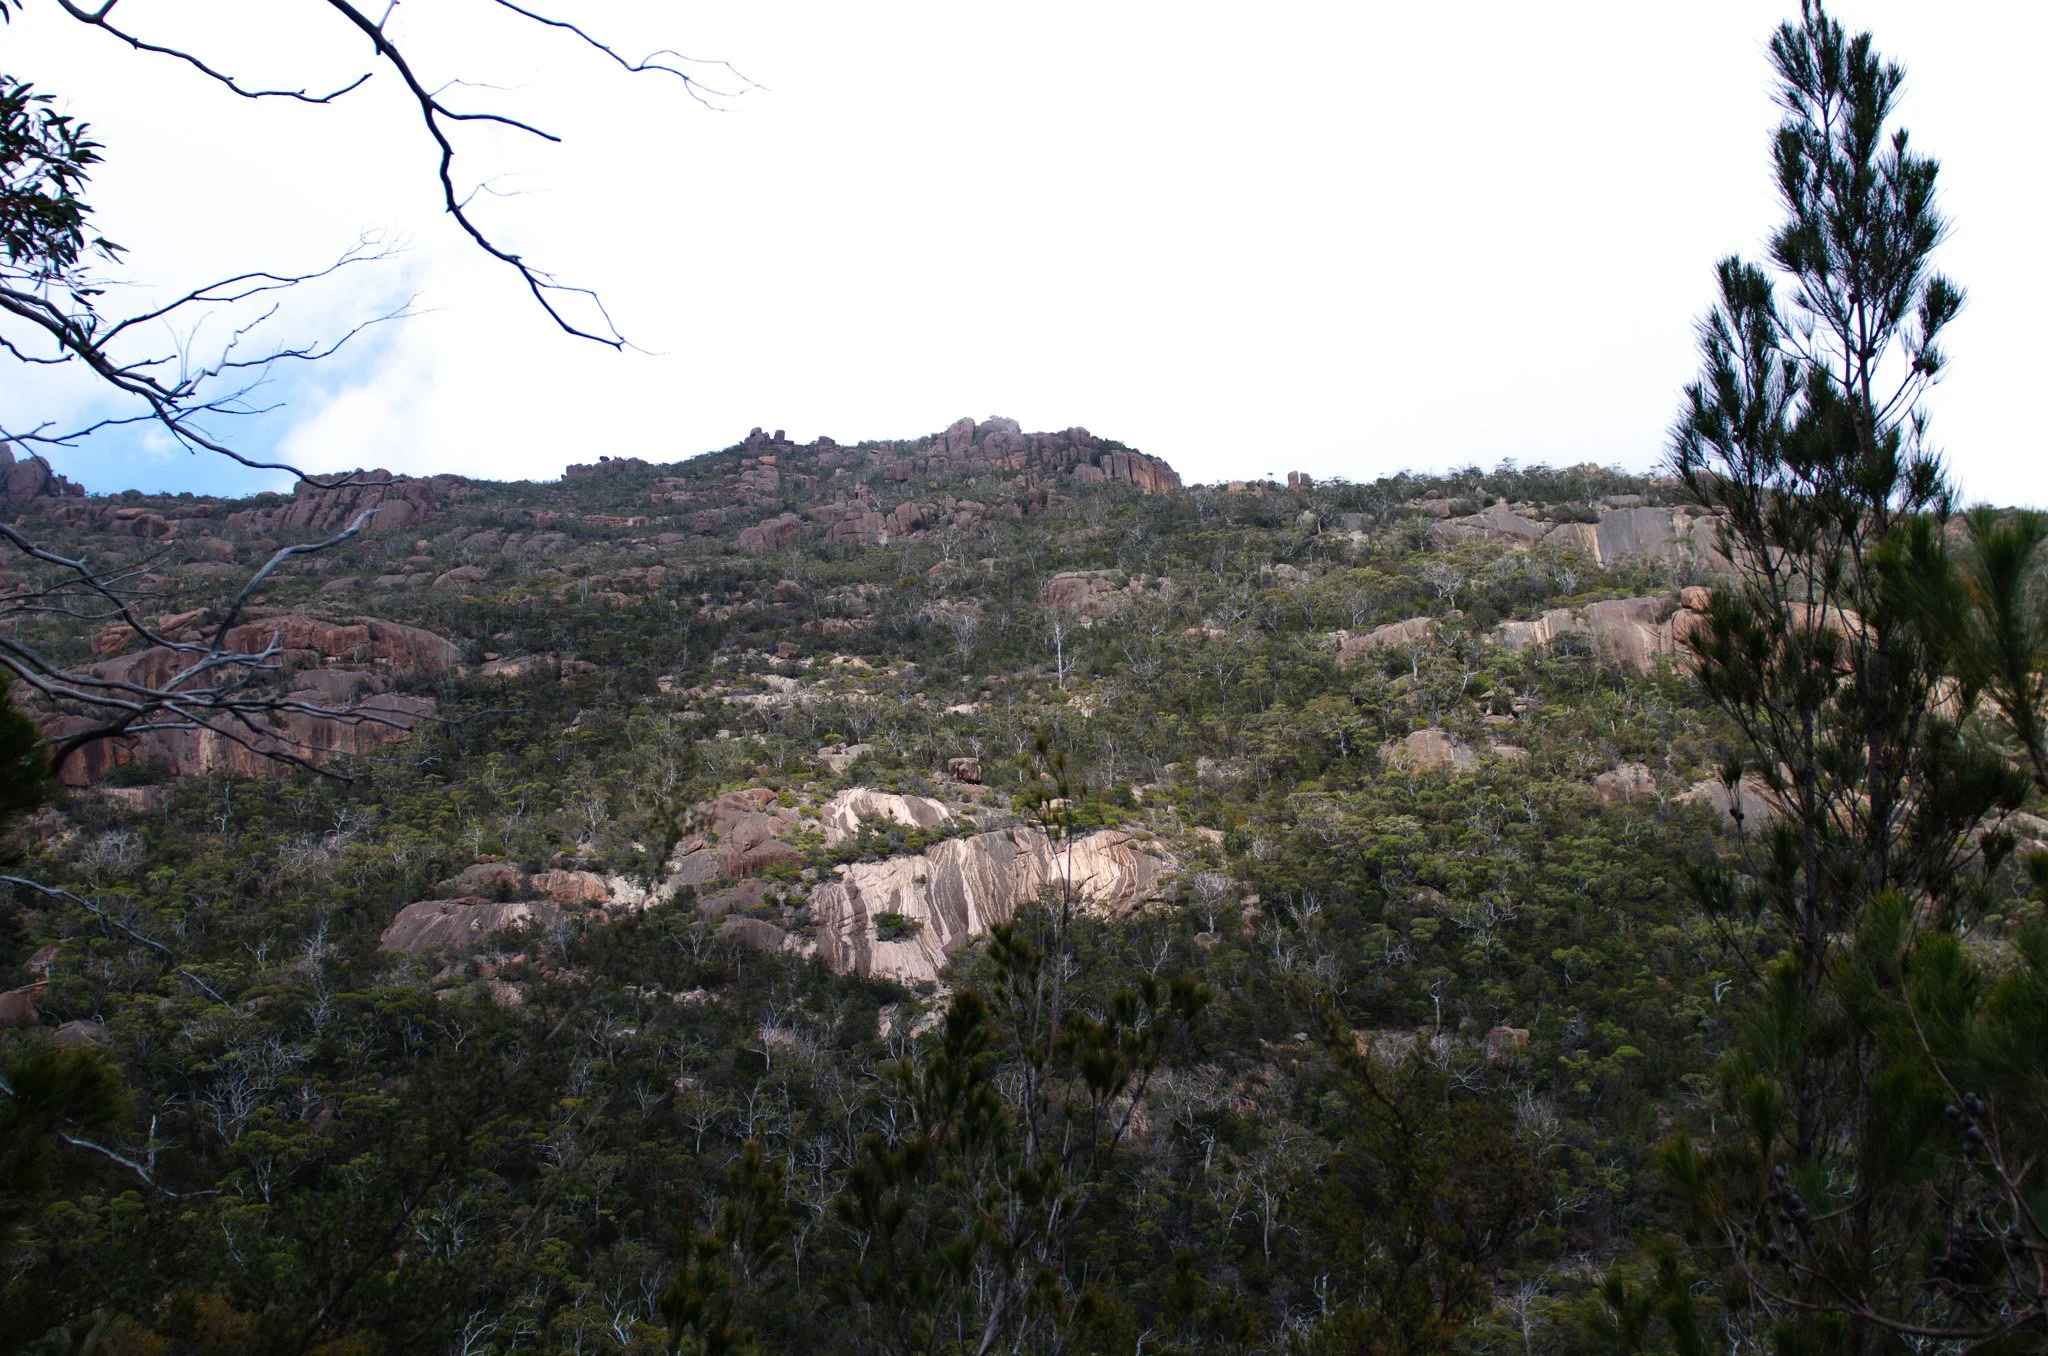


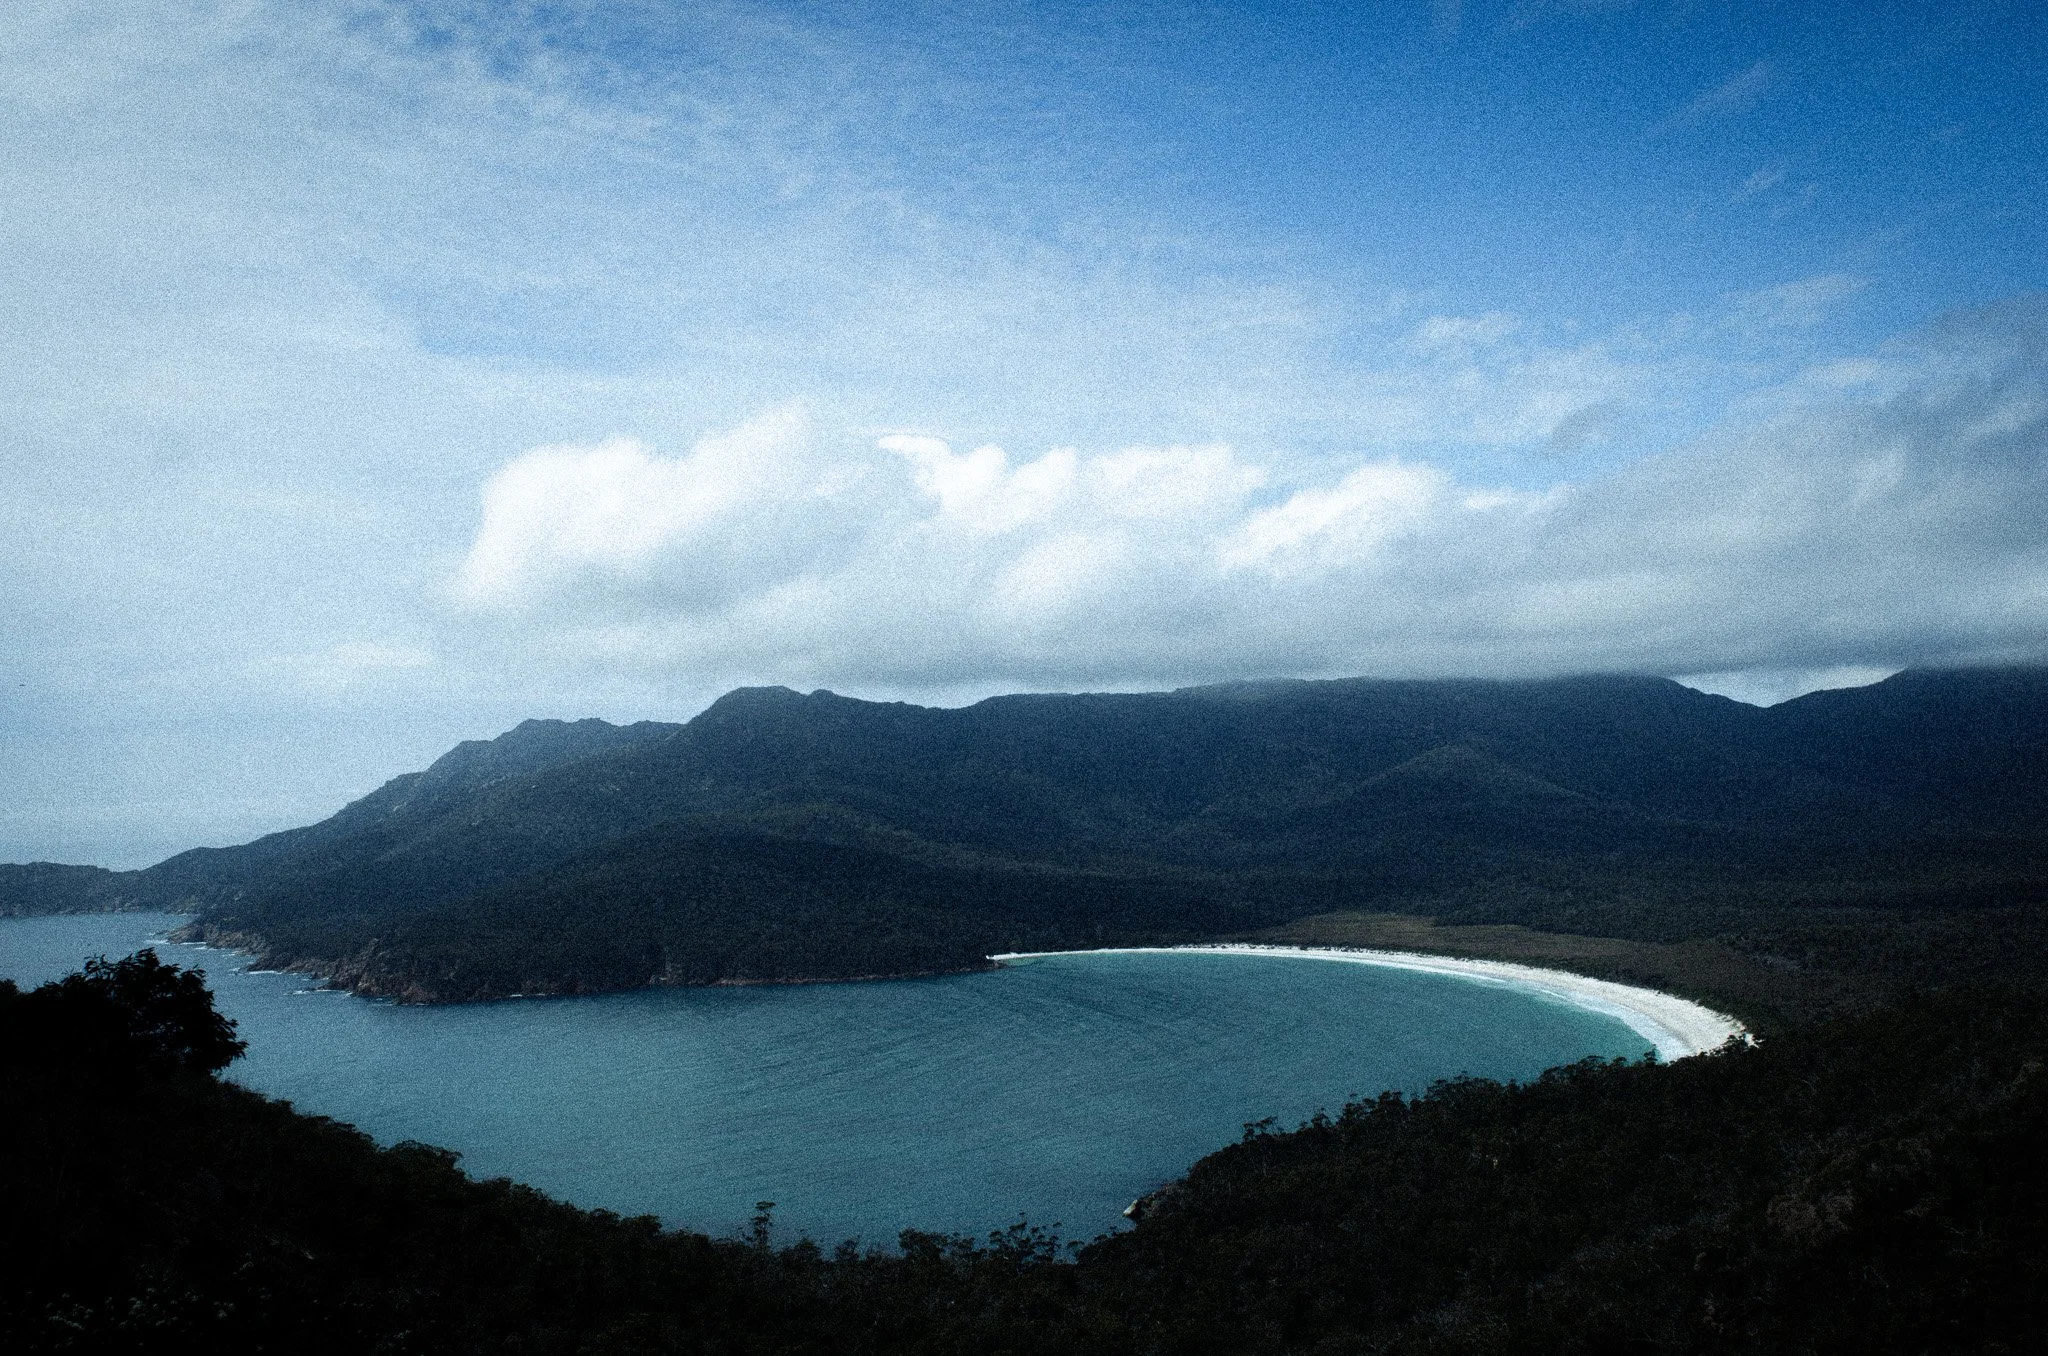
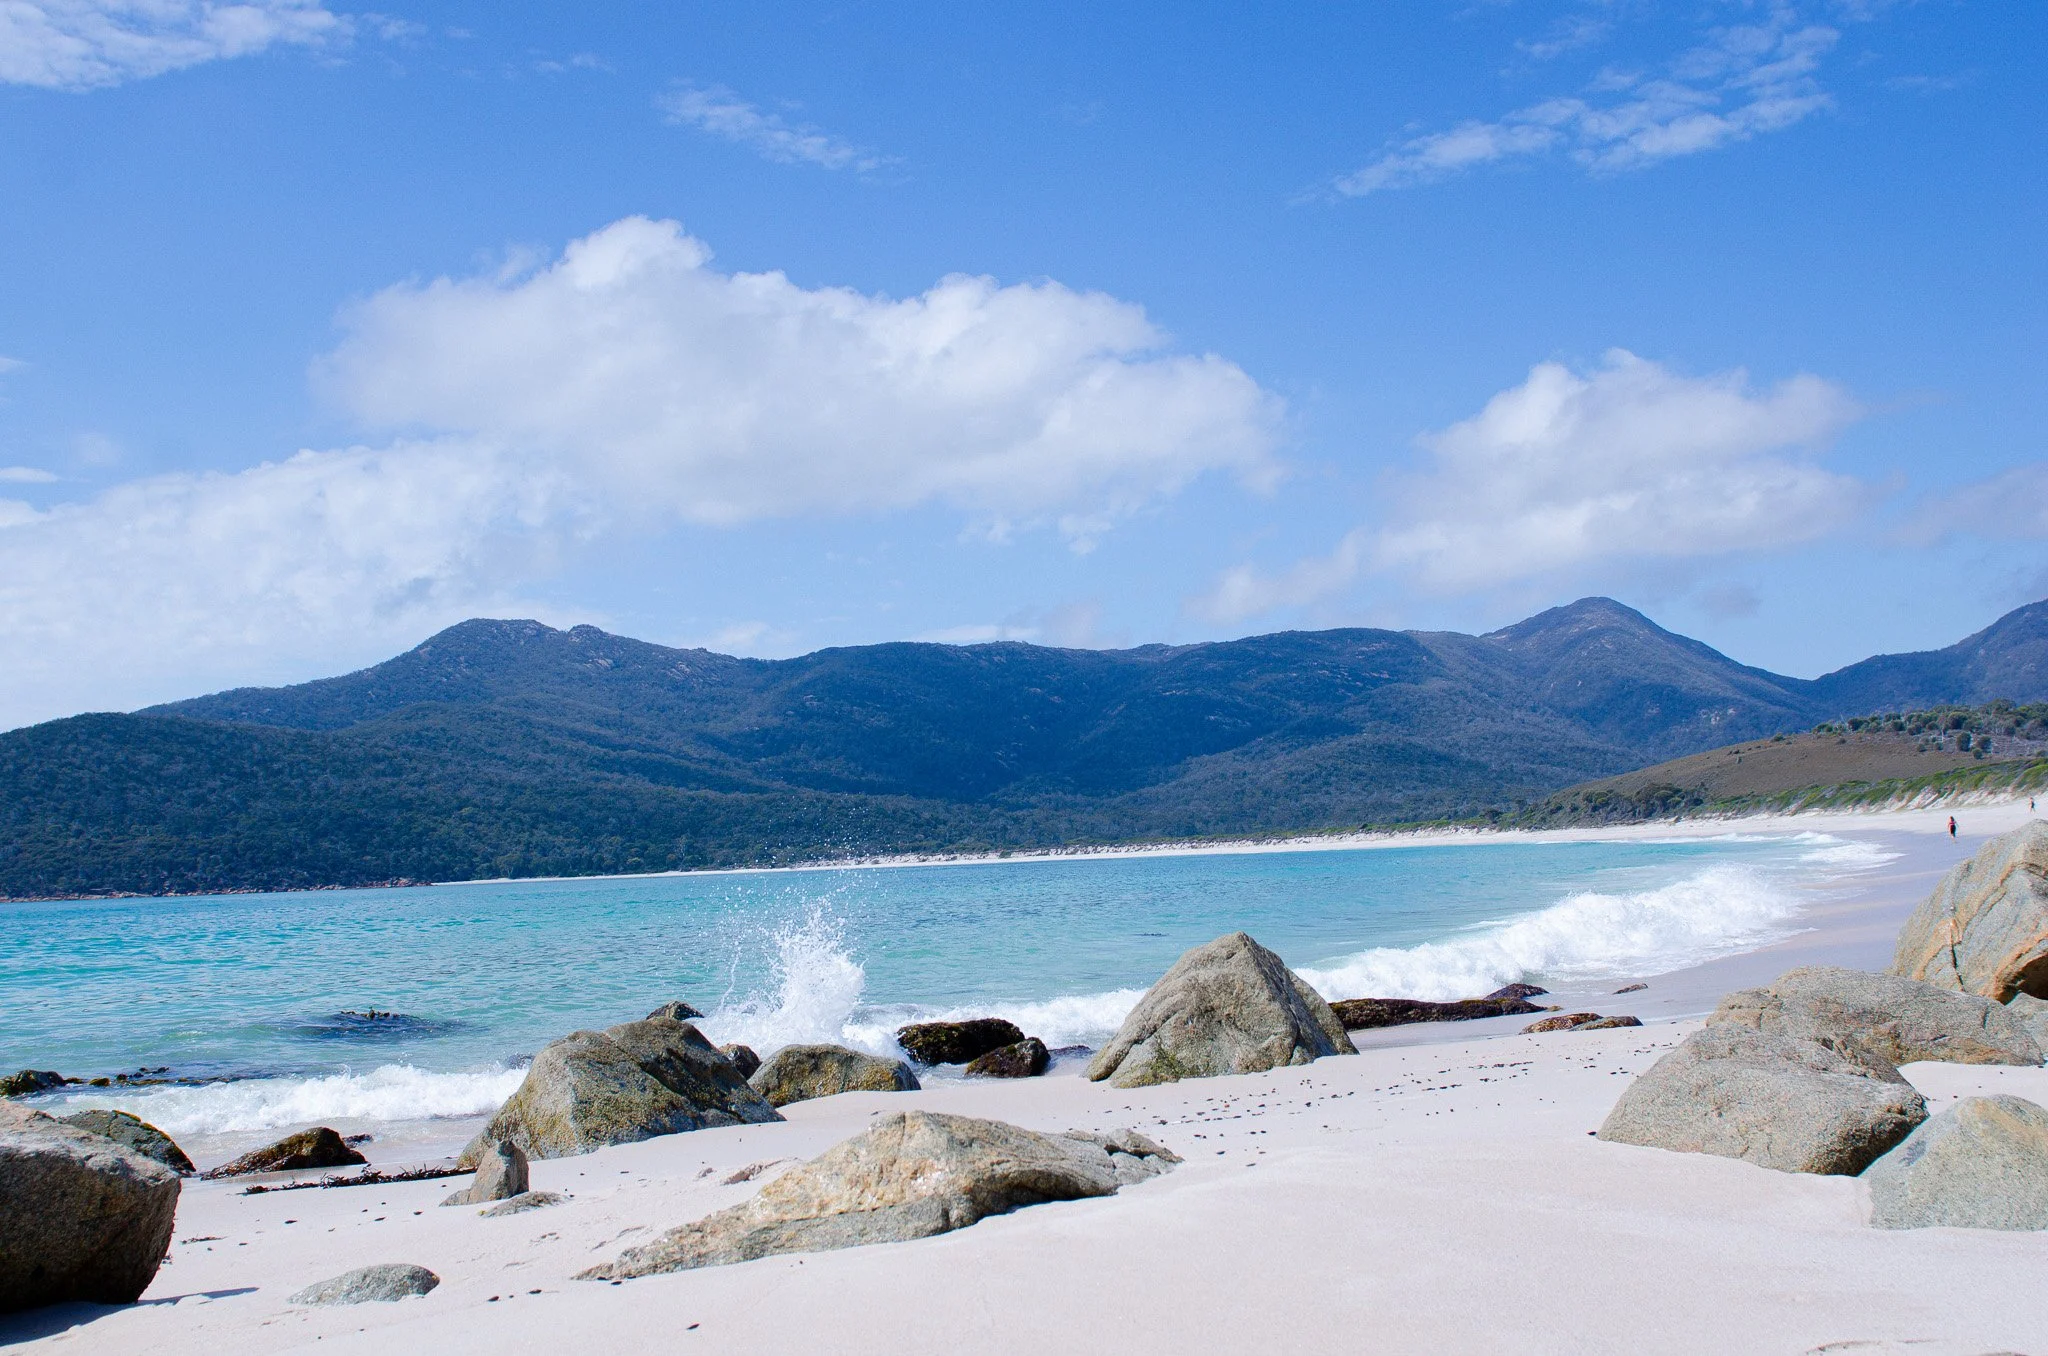
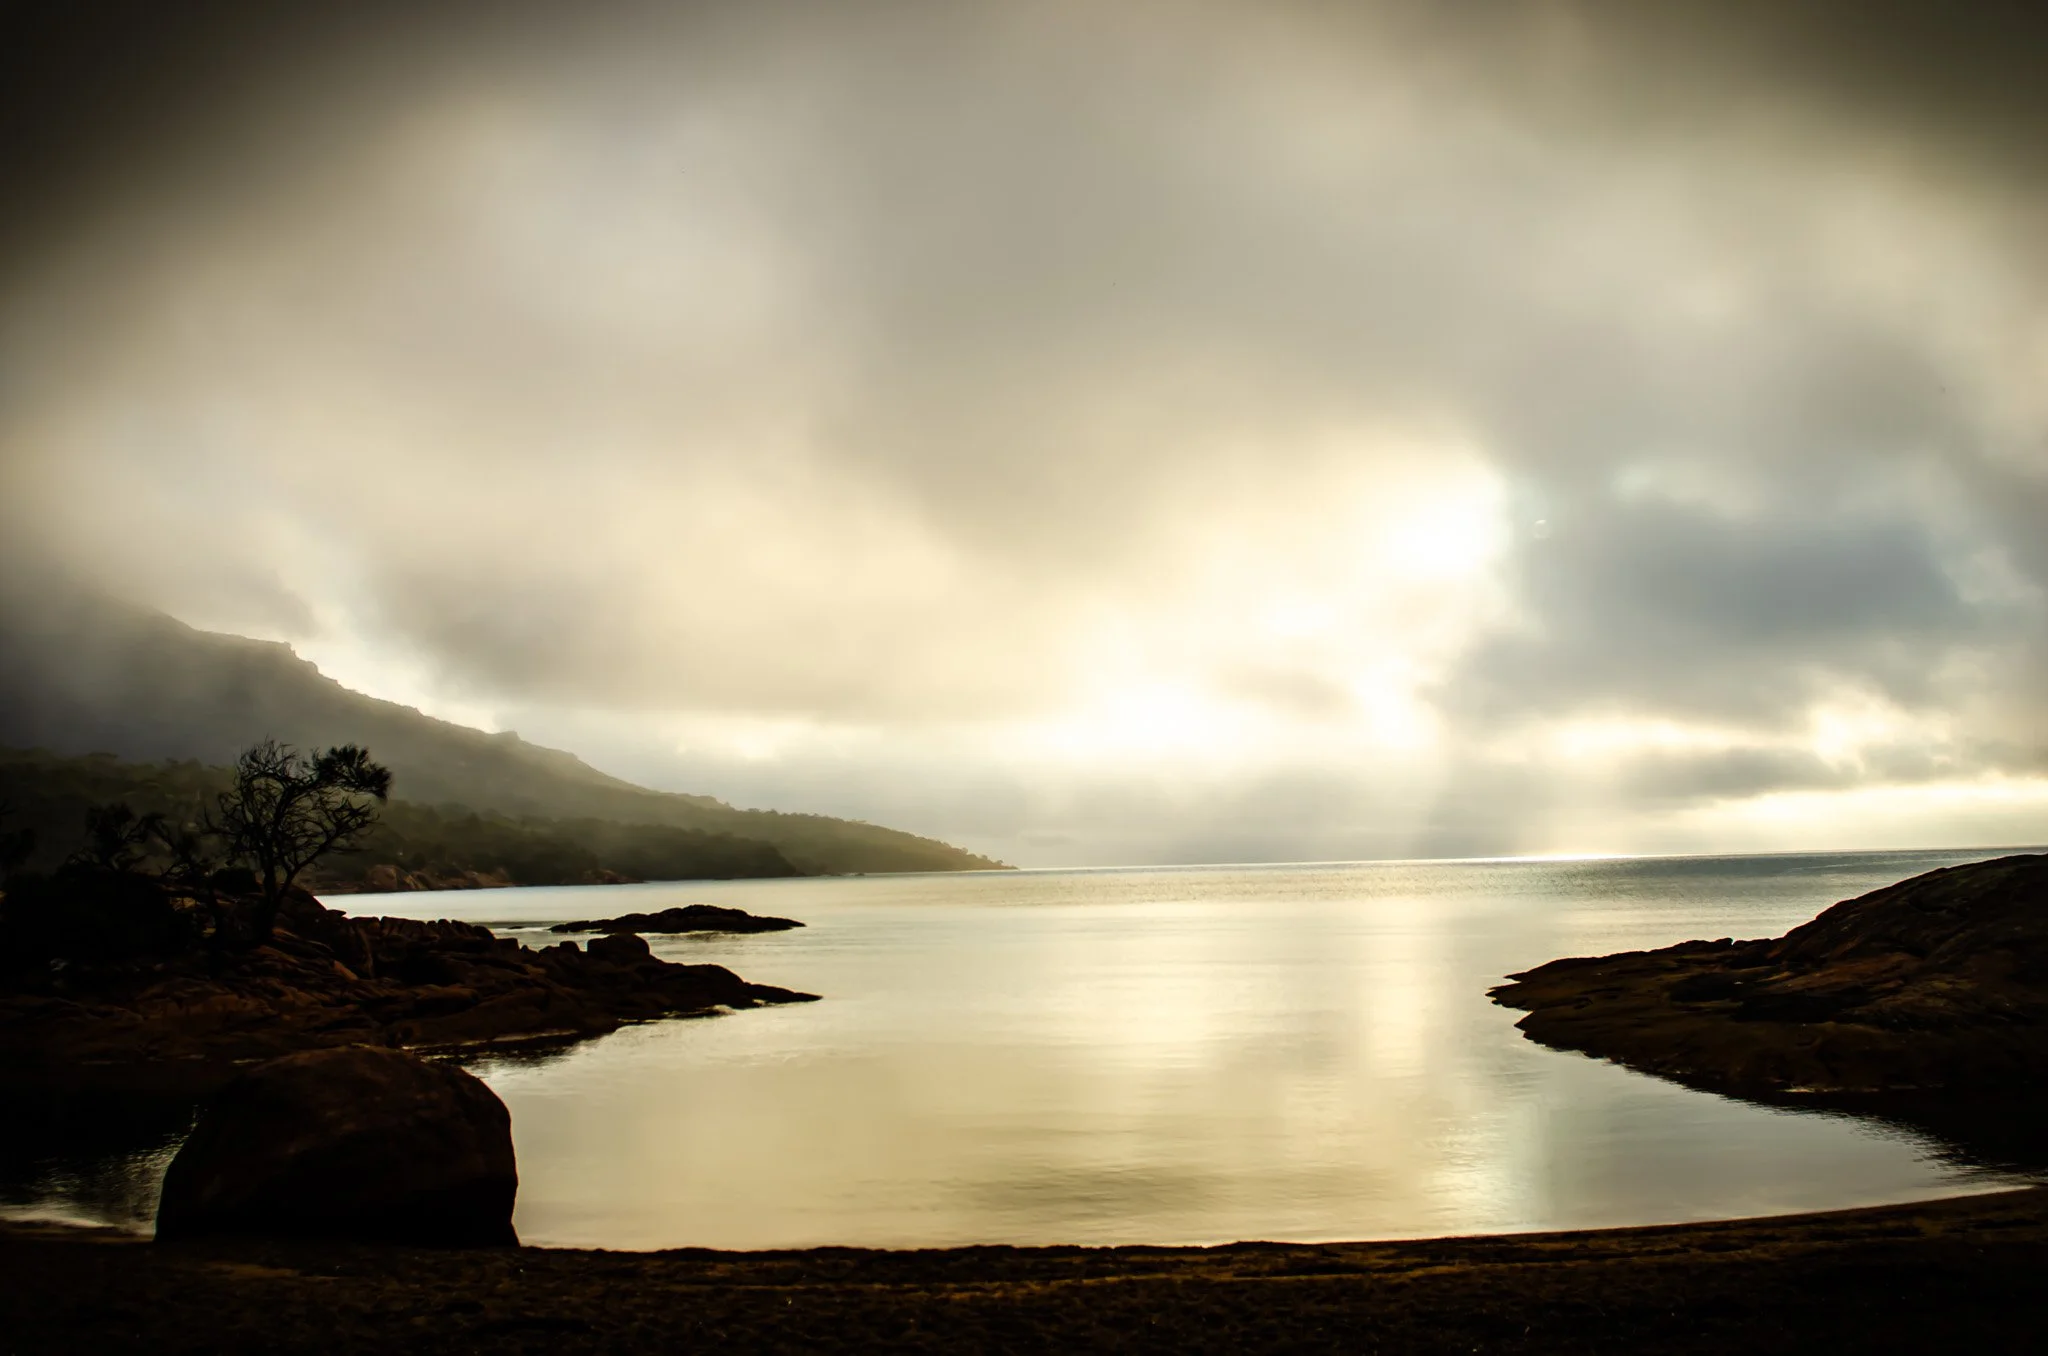
At the top, the view was spellbinding. No photograph could have done it justice. The soft crescent of white sand met a bay of turquoise glass, framed by the rose-tinted Hazards mountain range. It was every bit the postcard dream I'd imagined — and then some.

At the fork just below the lookout, we faced a decision: continue down to the beach via a steep track — over 1,000 rugged steps — or head back. The full Hazards circuit was too ambitious, but the lure of setting foot on that beach was too strong to ignore.
We decided to go for it.
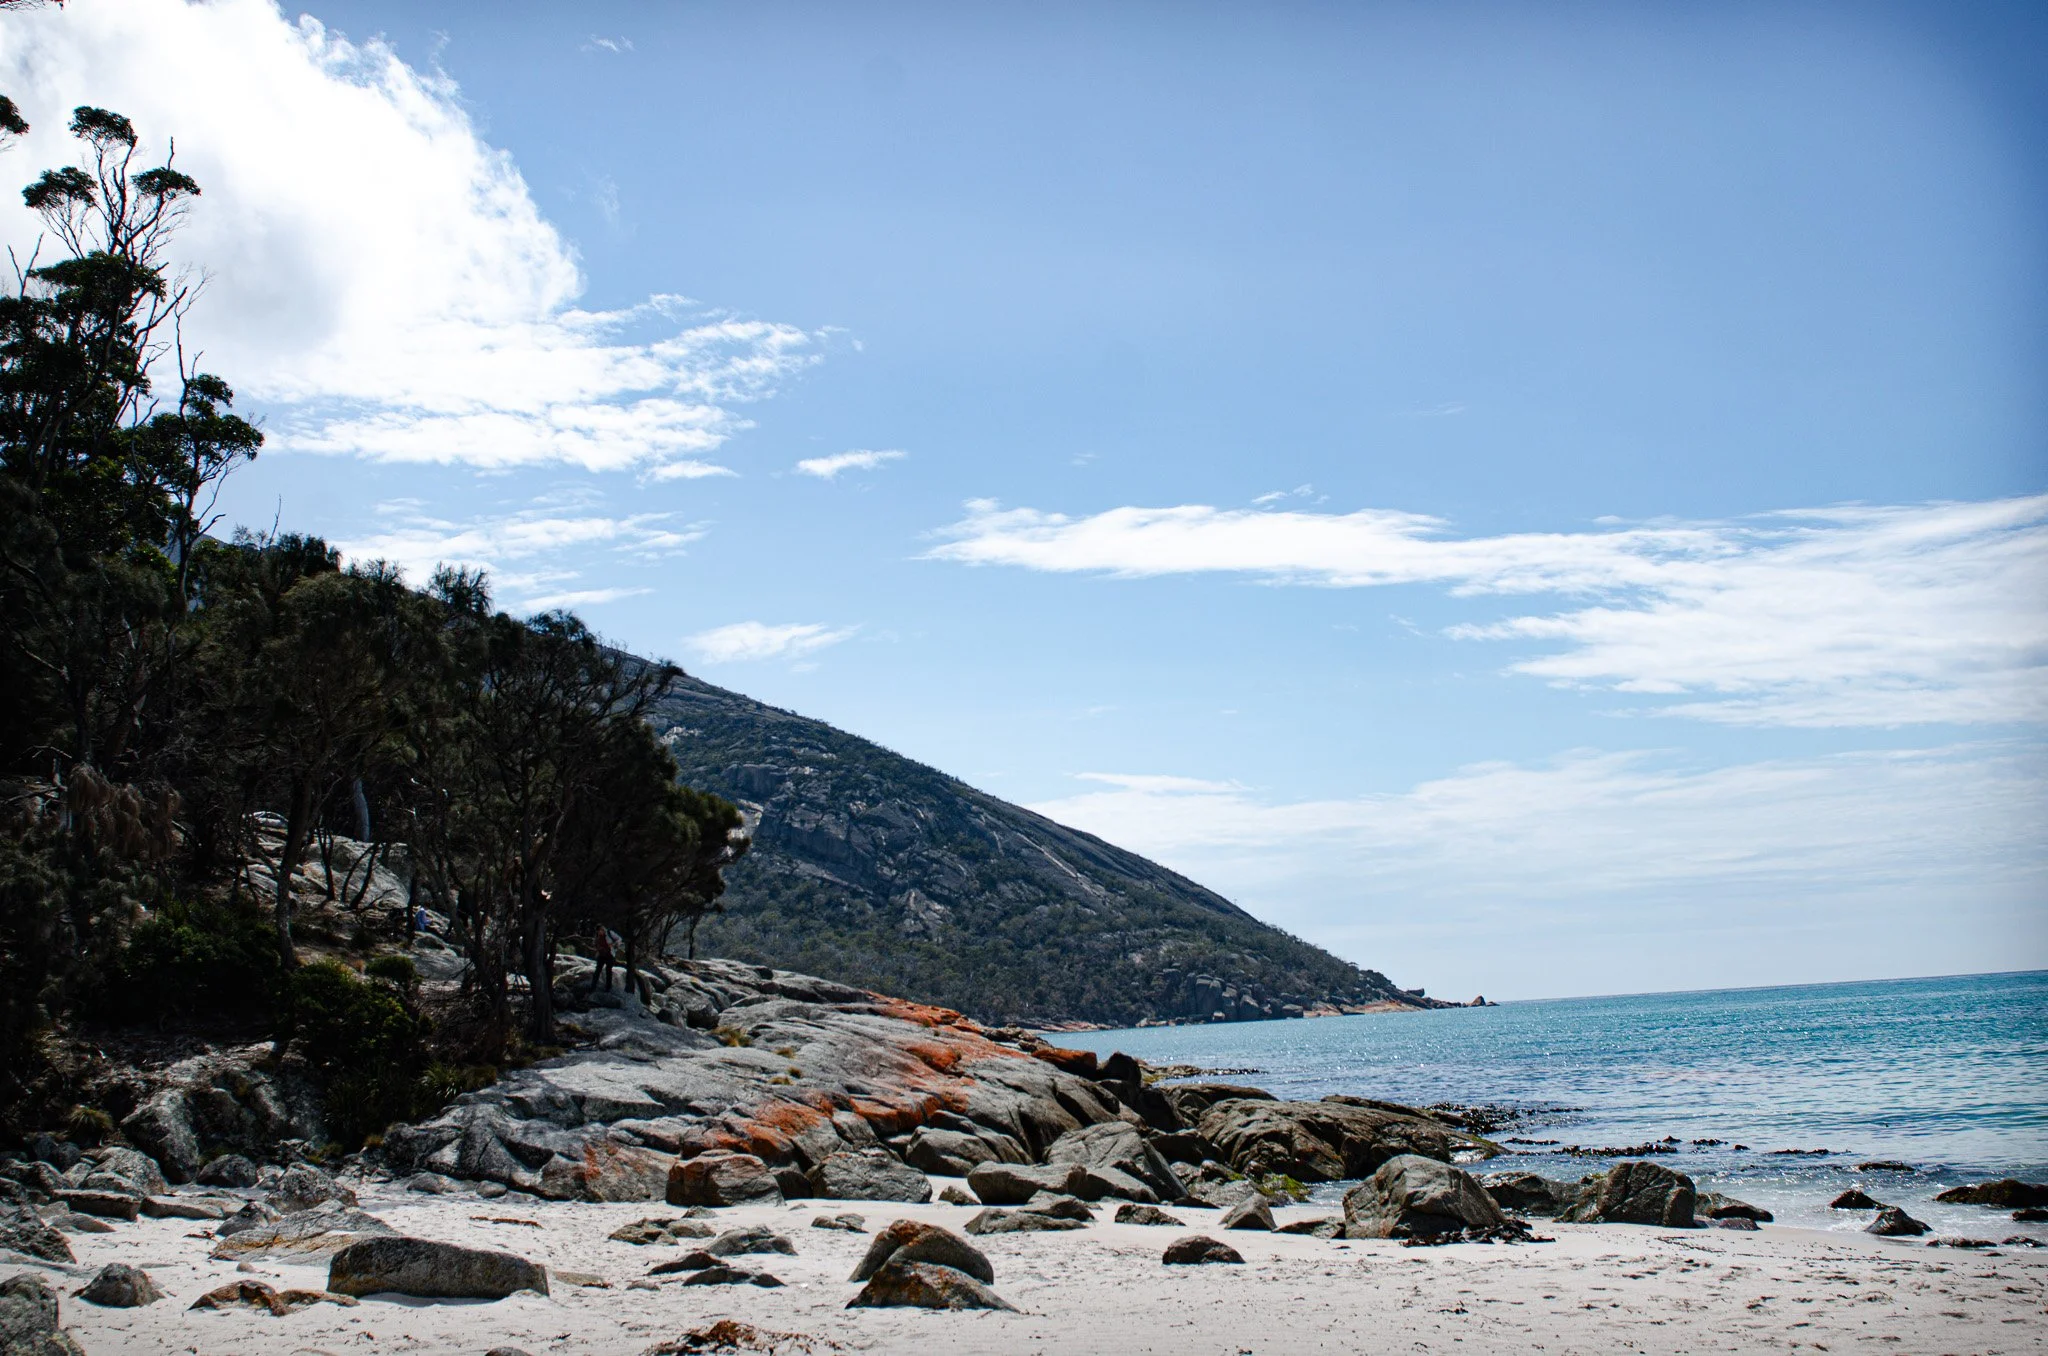
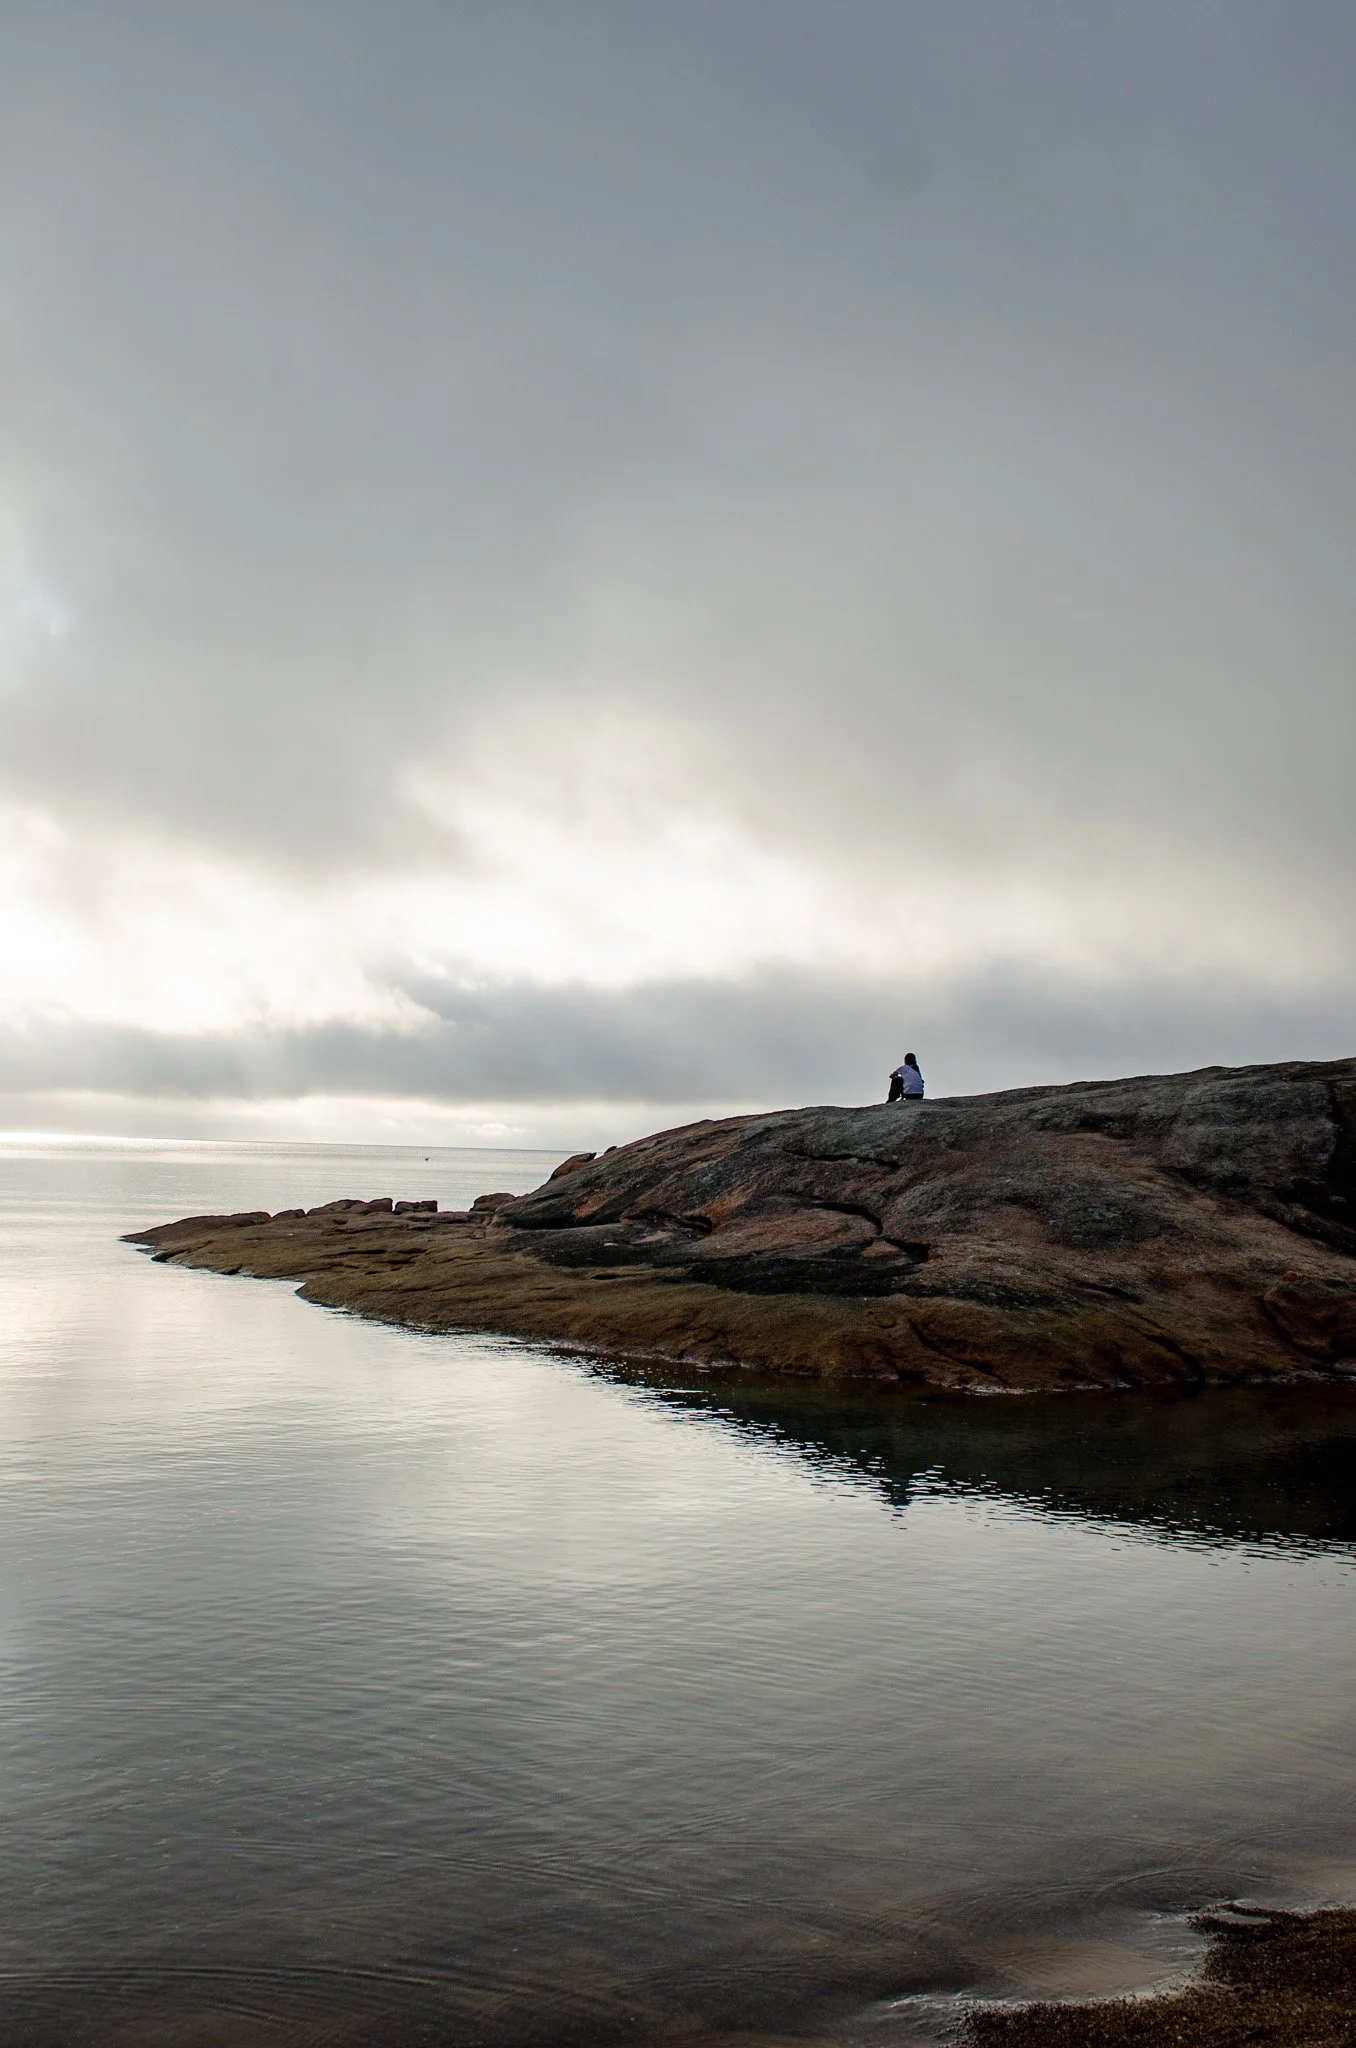
The descent was steep, rocky, and hard on the knees — but bearable. When we reached the sand, the effort melted away. The beach was pristine, silent, and ours alone. The sand was soft and warm, the water calm and rhythmic. Seagulls wandered by, uninterested in us, and the distant peaks stood watch like silent sentinels.


But while the beach was undeniably stunning, I’d say this: if you've already soaked in the view from the lookout, the beach below isn’t essential. What is essential, however, is knowing your limits. The climb back up nearly broke me.
The sun was now punishing. The steps felt endless. My breath came ragged. My backpack seemed heavier than before. A wave of dizziness crept over me. I was dangerously close to blacking out. Every few steps, I had to stop and regroup, willing myself to keep moving. A part of me wanted to collapse and let the earth swallow me whole.
But slowly — stubbornly — I made it back. As the ground levelled out and the breeze returned, my strength followed. I’d survived. And I’d earned lunch.
We headed to Freycinet Lodge, where the restaurant came highly recommended. We sat inside at first, but a glance outside changed everything. The view was irresistible — sparkling sea, rising mountains, and a quiet beach unfolding into the distance. We found a table tucked under a tree and relocated.
Lunch was everything I’d hoped — fresh seafood, beautifully plated, bursting with flavour. But then nature stole the show.
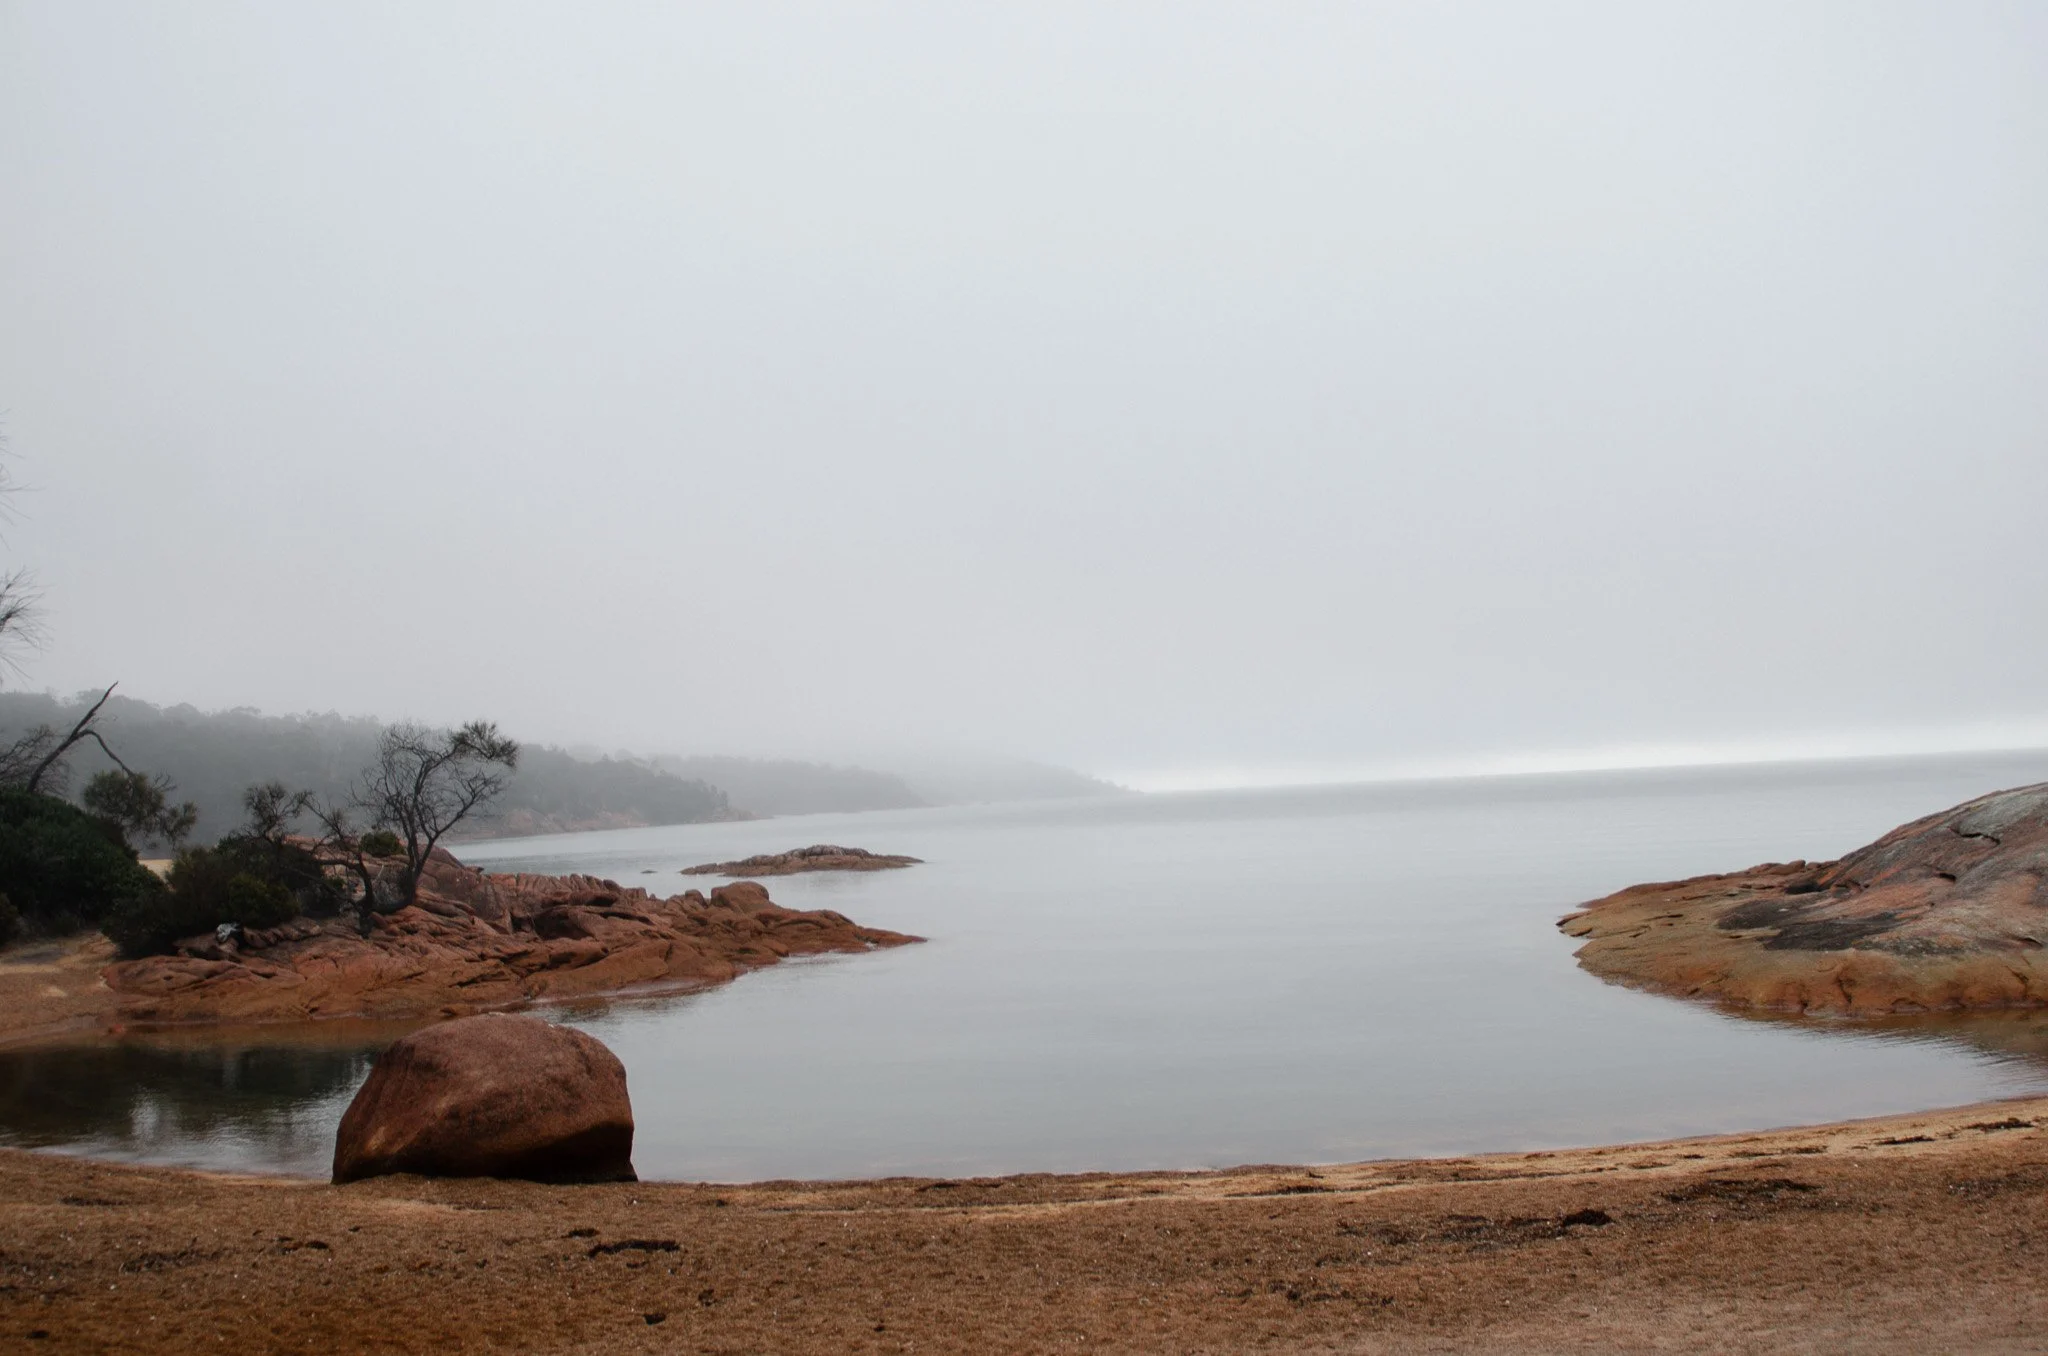
From the sea to our left, a thick fog began to roll in. Slowly, deliberately, it swept across the landscape like a living thing. In minutes, the distant mountain range vanished. The view we'd admired only moments earlier became a ghost. It was eerie — dreamlike — and oddly beautiful.
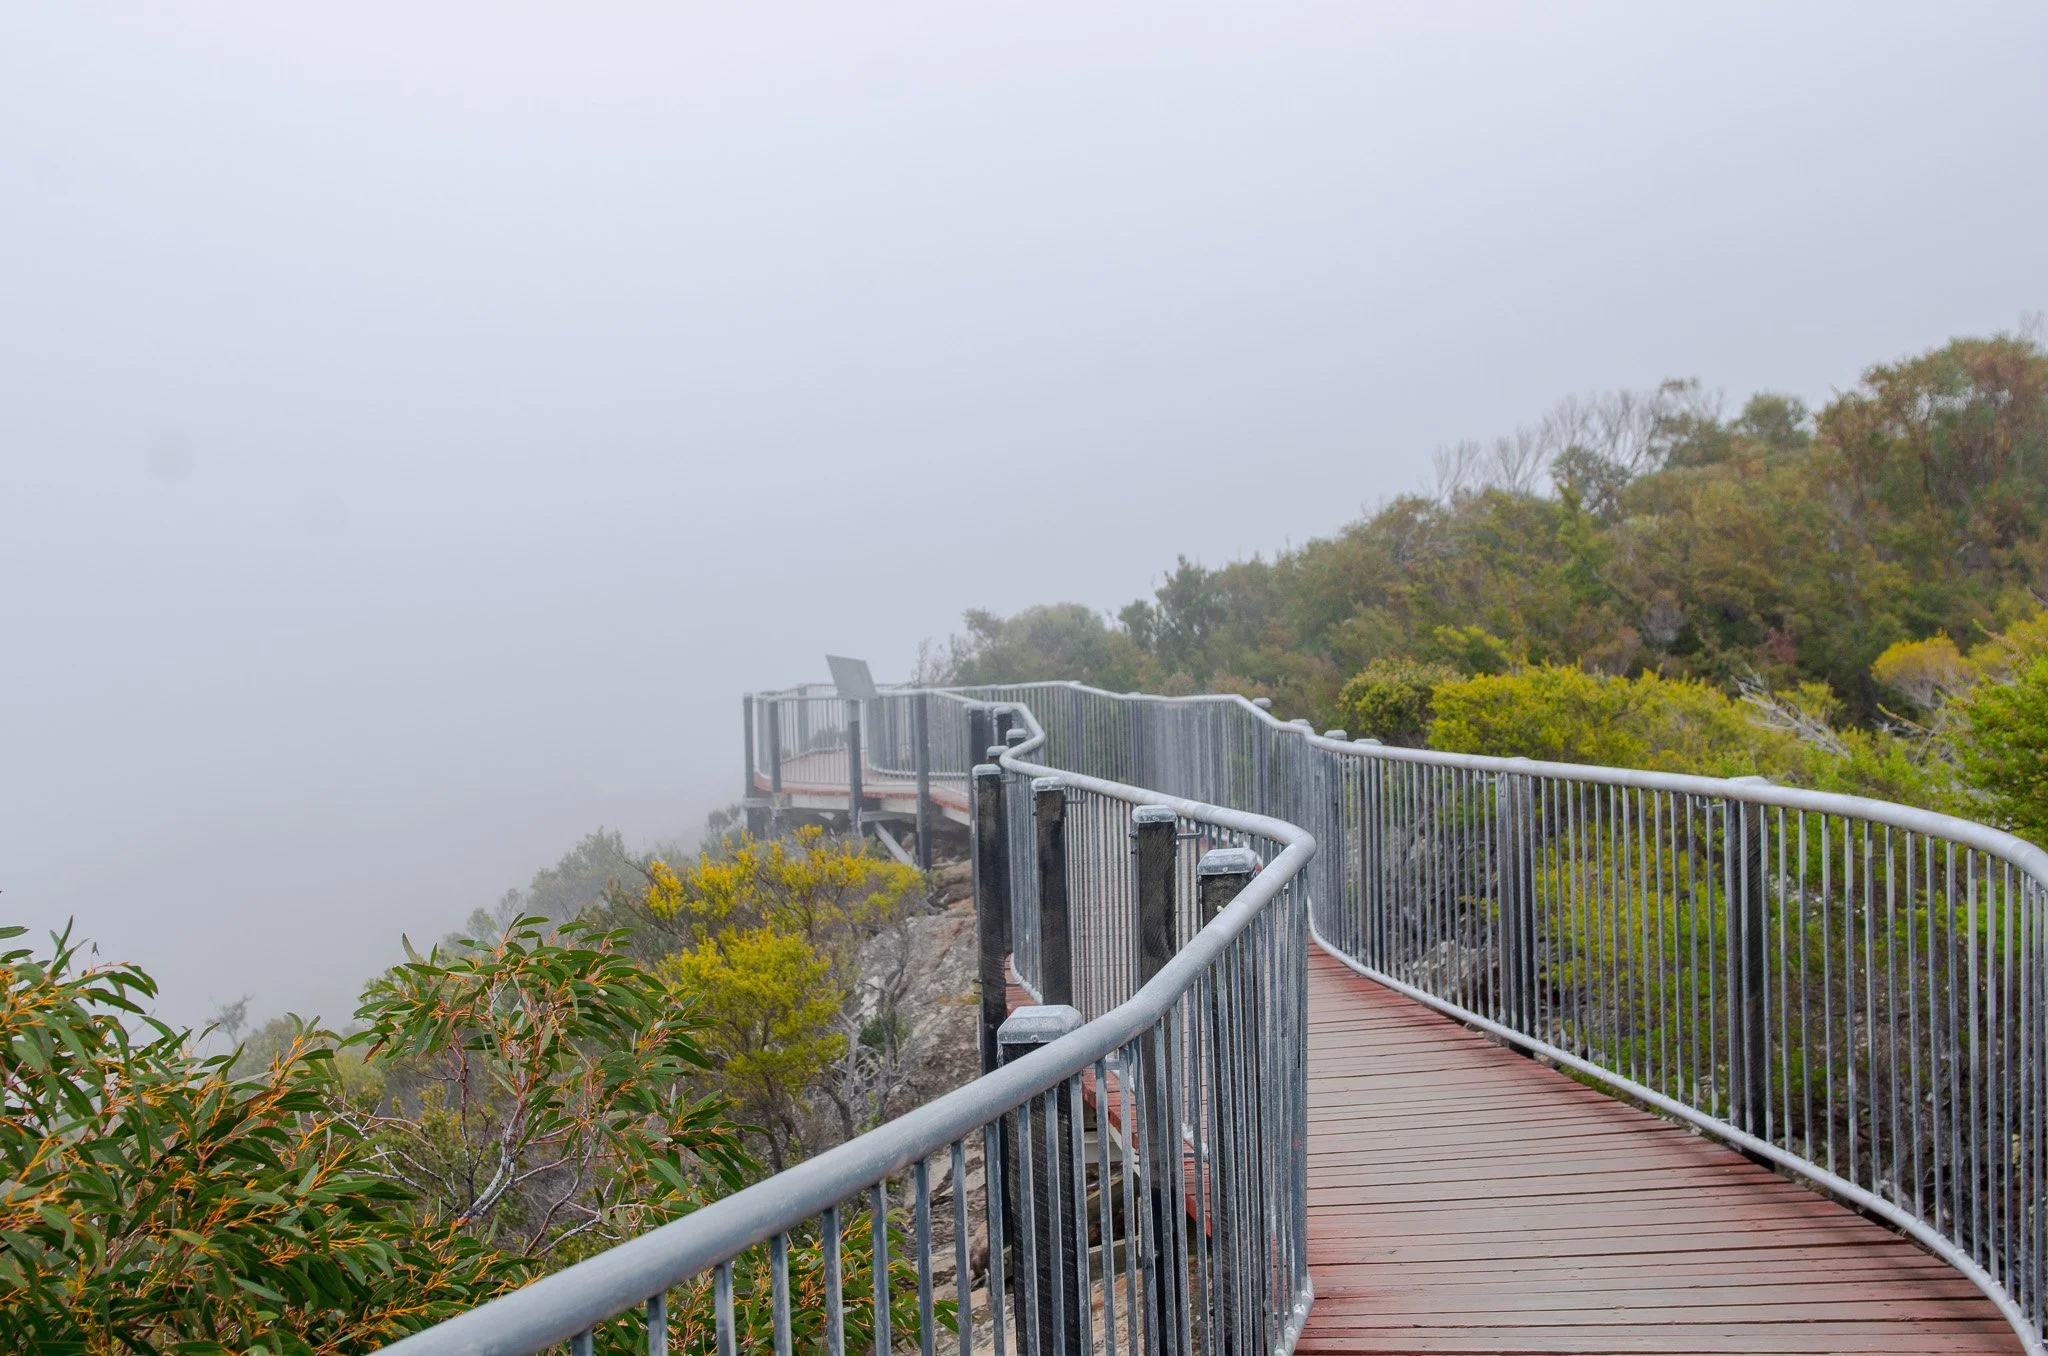
That same fog followed us to Cape Tourville, where we’d planned to scope out the sunrise viewpoint for the following day. The walk around the lighthouse was wide and accessible, with boardwalks hugging the cliff edge — or so we were told. All we could see was mist.
The world beyond the railing had disappeared. There was no sea, no cliffs, no drop below. The boardwalk felt like a path through the clouds — otherworldly and strangely peaceful. With visibility so poor, we turned back early, hoping for clearer skies come morning.


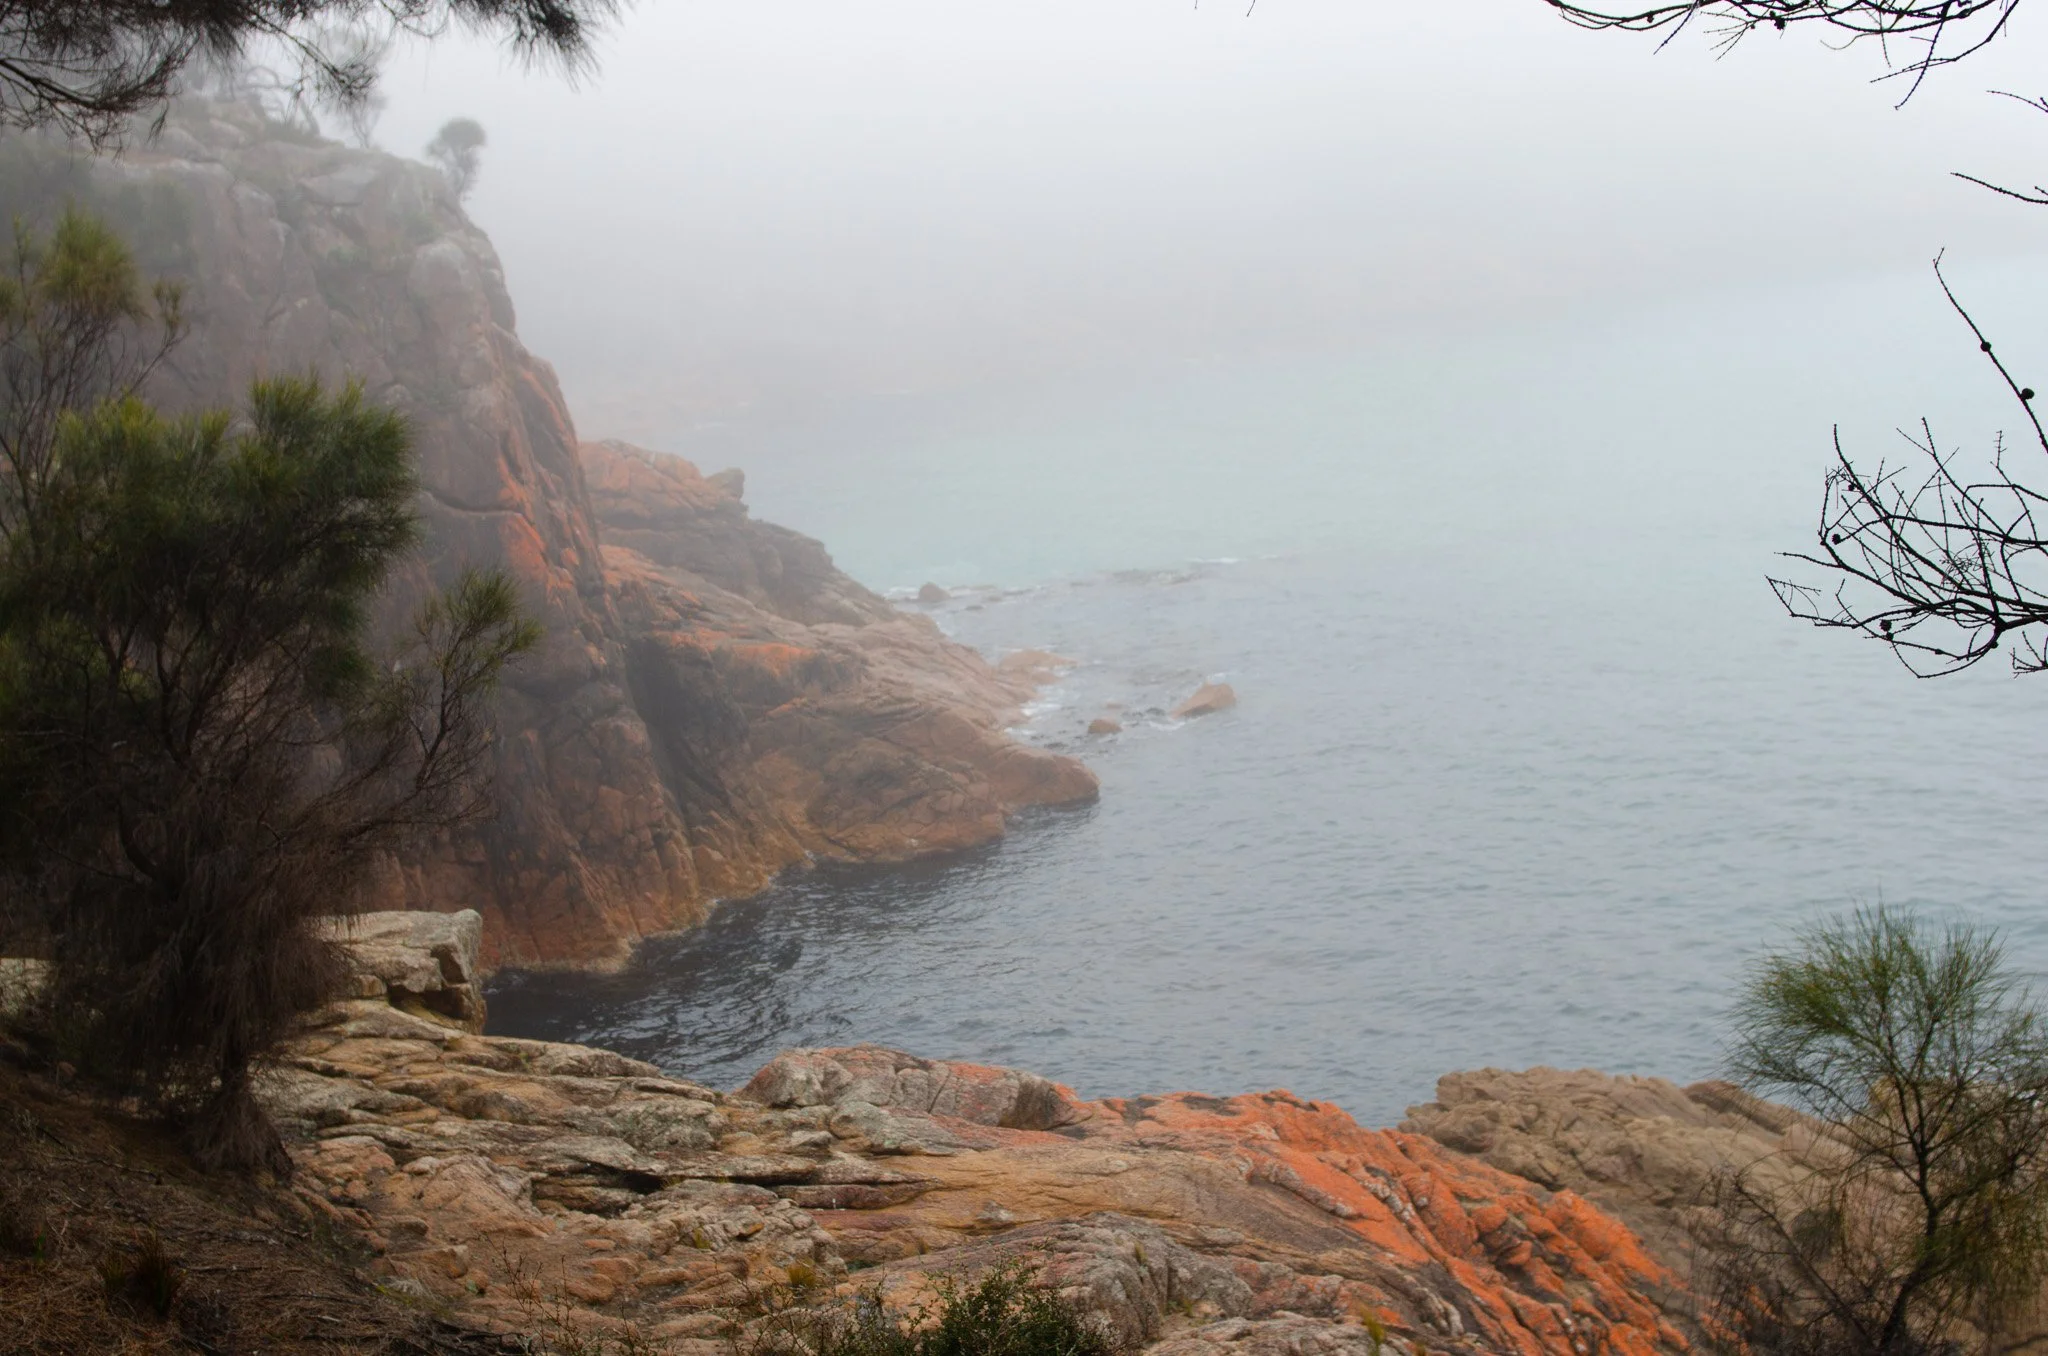
With time to spare, we let the road guide us — and it did not disappoint. Along a rugged clifftop, the view opened up to crashing waves and jet-black boulders splashed with brilliant orange lichen. It felt raw and wild — a reminder of nature’s power and our own smallness.
Soon, we found ourselves at the start of an unmarked trail. No cars, no signs. Just a path. We followed it.
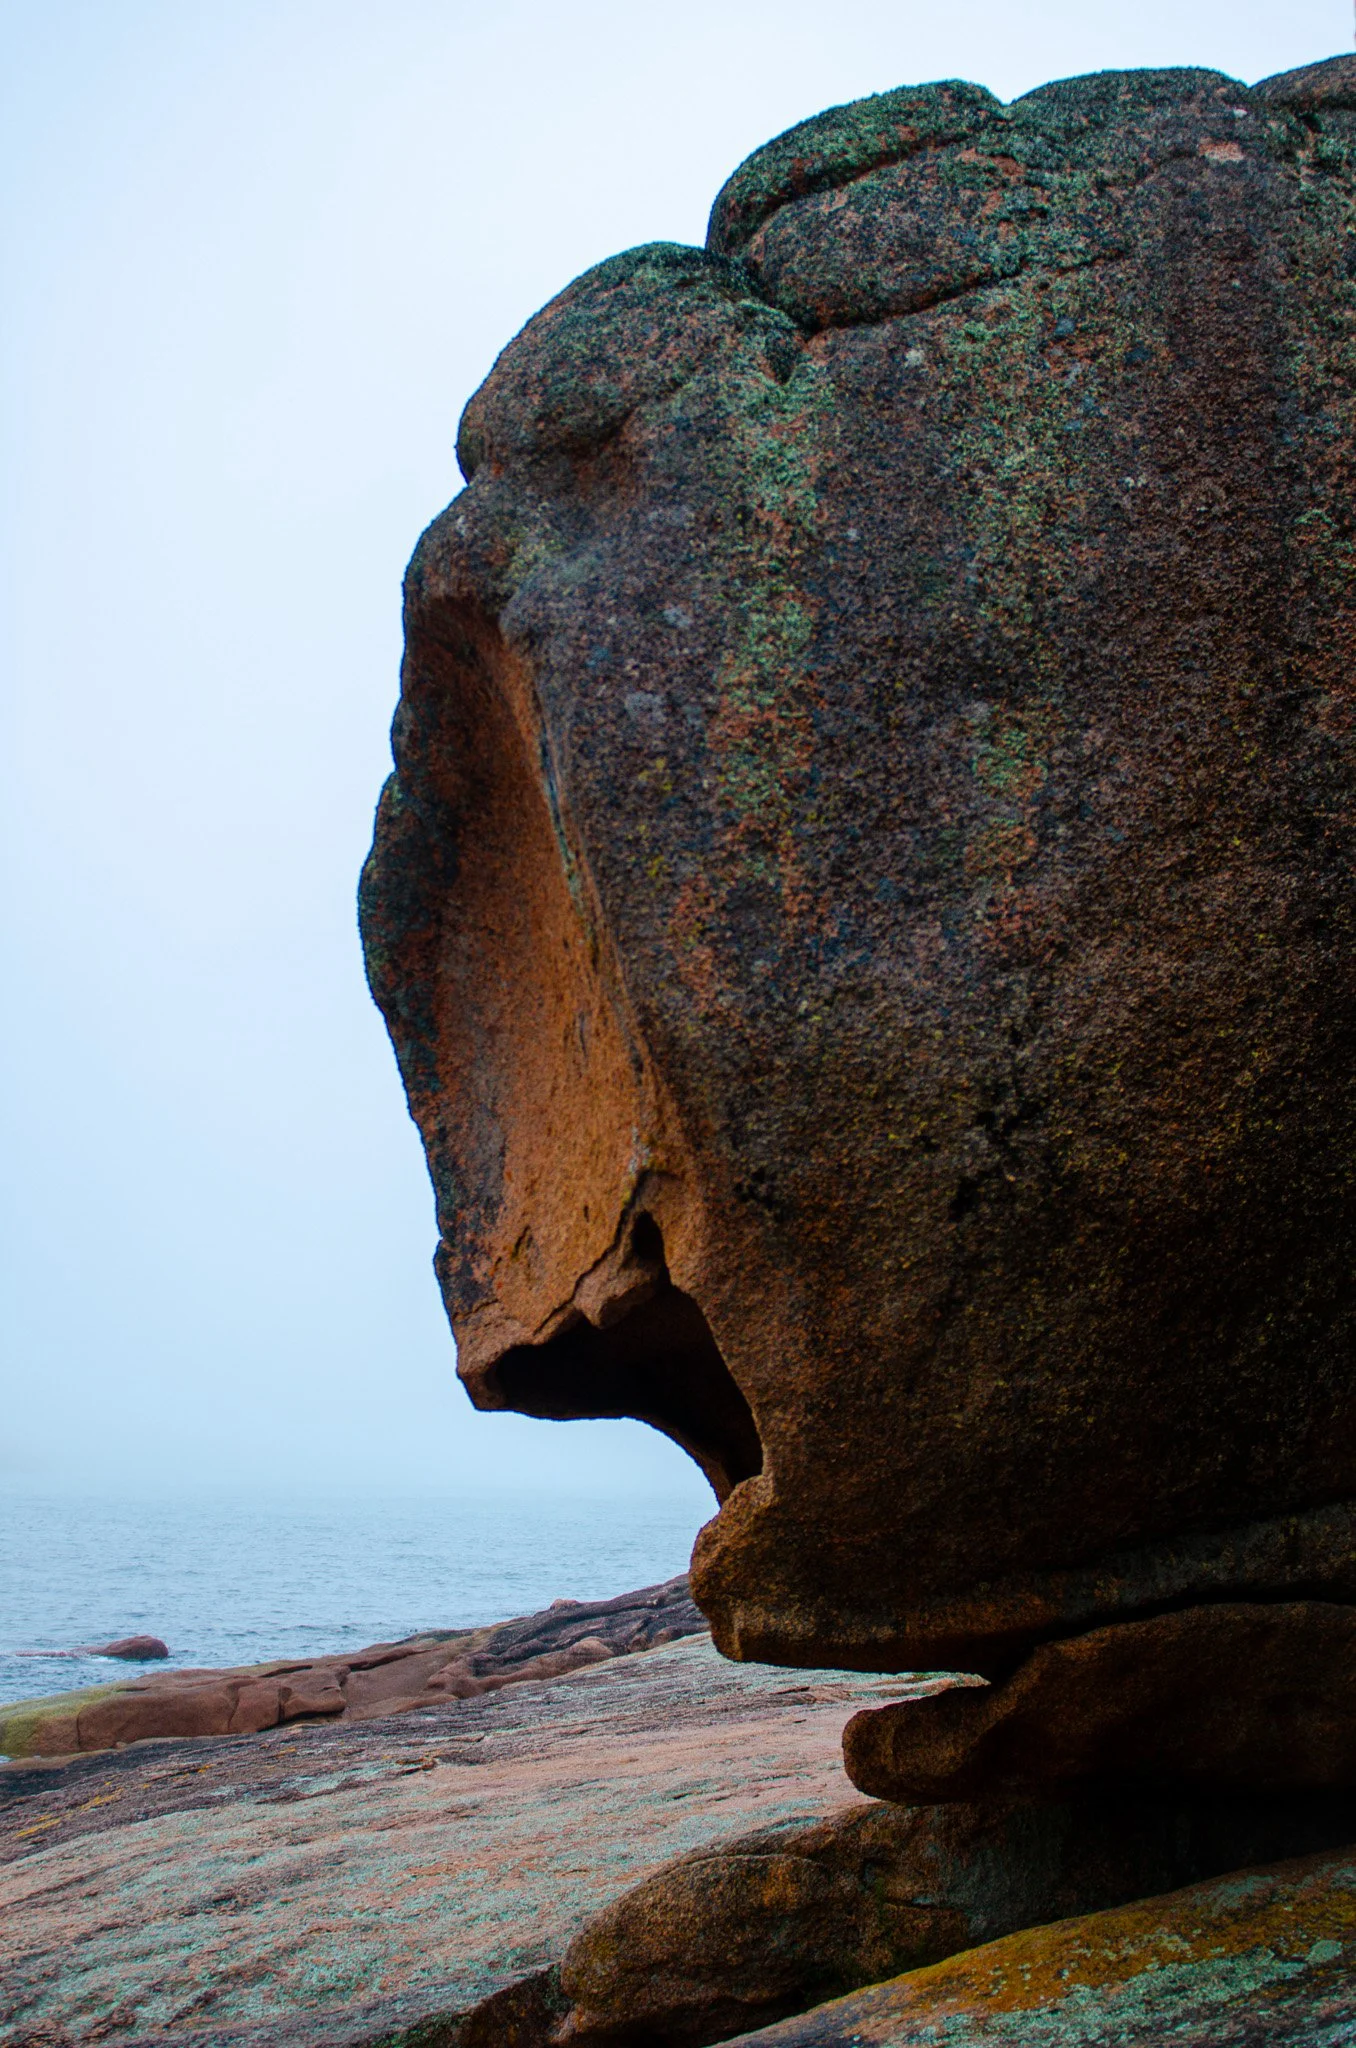
The trail led gently downhill until, with a final clearing of trees, it revealed Sleepy Bay. The name didn’t suit it. The place crackled with energy — jagged rocks, hidden caves, and a turbulent sea. The waves slammed against the shore with ferocity, stirring something deep and familiar inside me. The kind of feeling that tugs at memory, at childhood, at something elemental.


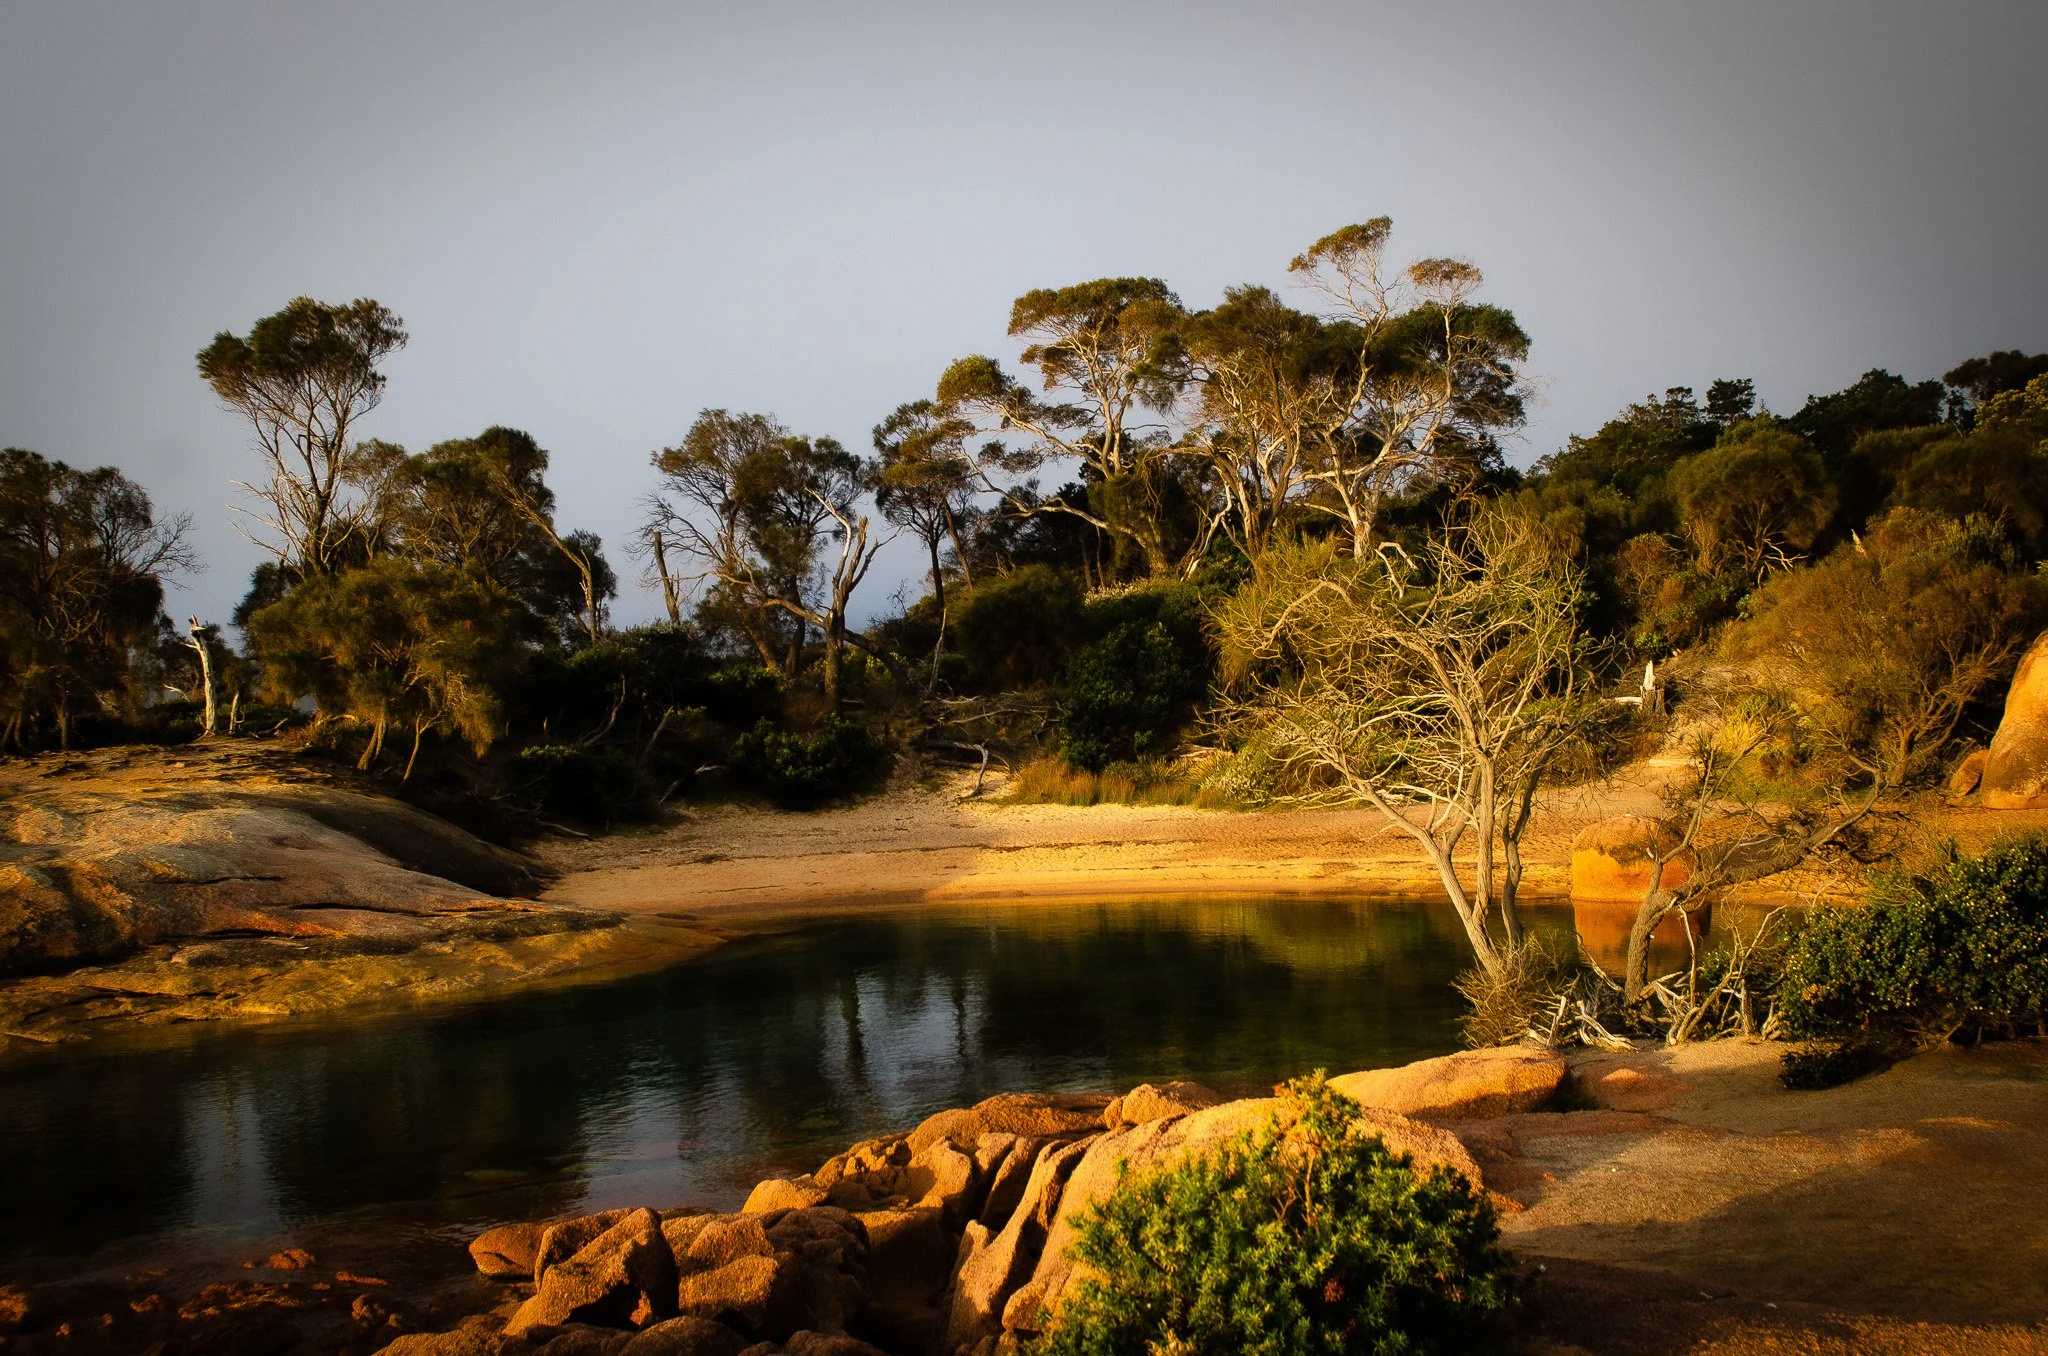
Our last stop of the day was Honeymoon Bay, a cove as sweet as its name. Quiet, intimate, and postcard-perfect. We wandered its shores alone, tracing the shape of the rocks and choosing our spot to watch the sun go down.


As if on cue, the clouds parted. Just for a moment, the bay caught fire — rocks glowing gold, water catching the light like polished glass. The sun dipped low, casting its final spotlight across the solitary rock jutting from the water. Then, just like that, it was gone.

We drove back to Coles Bay in a quiet daze. Too tired to go out, we grazed on snacks and turned in early, hopeful that tomorrow’s sunrise at Cape Tourville would reveal all that today’s fog had hidden.